
Get Started
Follow the steps below to add AuthorizationHub to a .NET Core web application.
Create Project & Install Packages
AuthorizationHub supports SqlServer, Postgres, and Sqlite. Just choose the database that fits with your needs, and add the cooresponding nuget package.
dotnet new web -n MyWebApp

cd MyWebApp

dotnet add package AuthorizationHub
dotnet add package AuthorizationHub.UI
dotnet add package AuthorizationHub.Data.SqlServer // Or
dotnet add package AuthorizationHub.Data.Postgres  // Or
dotnet add package AuthorizationHub.Data.Sqlite
Prepare Startup.cs
After installation, update your Program.cs file:
using AuthorizationHub;
using AuthorizationHub.Data.SqlServer;
using AuthorizationHub.UI.Extensions;

var builder = WebApplication.CreateBuilder(args);

// Sets up DI and needed authorization policies.
builder.Services.AddAuthorizationHub();

// Configures AuthorizationHub to use SQL Server
builder.Services.AddSQLServerToAuthorizationHub();  // Or
builder.Services.AddPostgresToAuthorizationHub();  // Or
builder.Services.AddSqliteToAuthorizationHub();

var app = builder.Build();

app.UseRouting();
app.UseAuthorization();

// Adds routes for UI and rest endpoints.
app.UseAuthorizationHubUI();

app.Run();
Configuration Data
Configuration data is stored in the app.config file, in a section called "AuthorizationHubOptions". You need to provide a connection string to the database, user ids for anyone who should be an administrator, and a license key.
Lets start with adding the connection string. There are three storage options for you to choose from.
- Microsoft SqlServer
- PostgreSQL
- SQLite
In the case of SqlServer and Postgres, you will need to create a database on your server for AuthorizationHub. Sqlite simply uses a file that will be created when you access the AuthorizationHub UI.
Here are examples of connection strings for each. Obviously, you should only use one.
  "AuthorizationHubOptions": {
    "SqlServerConnection": "Server=localhost;Database=AuthorizationHub;User ID=;Password=;MultipleActiveResultSets=true;TrustServerCertificate=True",
    "PostgresConnection": "Host=localhost;Port=5432;Database=AuthorizationHub-DB;Username=;Password=",
    "SqliteConnection": "Data Source = AuthorizationHubDatabase.sqlite",
  }
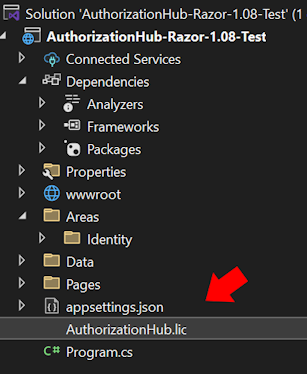
The next step is to add a license file. It will be provided when you purchase a license to use AuthorizationHub.

Create a file named AuthorizationHub.lic and place it in the base directory of the AppDomain. If you are using AuthorizationHub in an IDE, you can simply put it in the web application's project, and set the "Copy to Output Directory" property of the file to "Copy if newer". The license data is a JWT. Simply paste the license data into the file and save it.
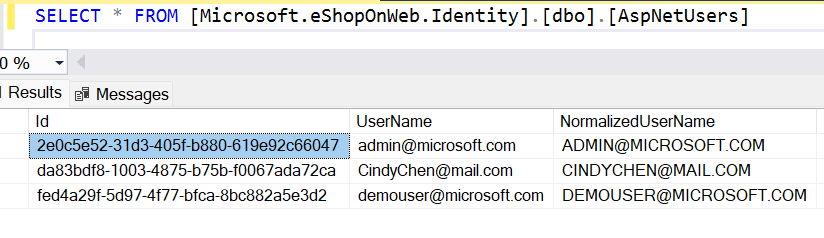
We need a way to tell AuthorizationHub who the administrators are before the application has ever started. It’s a chicken before the egg sort of problem. When a user logs into your application, AuthorizationHub will look to see if the user has a "NameIdentifier" claim. In the case of ASP.NET Core Identity, that value would be the "AspNetUsers.Id" field. If the value in that claim is found in the list of administrators in the appsettings.json file, the user is given access to edit data in AuthorizationHub.
SELECT * FROM AspNetUsers
The license key is provided when you purchase a license to use AuthorizationHub.
  "AuthorizationHubOptions": {
    "SqlServerConnection": "Server=localhost;Database=AuthorizationHub;User ID=;Password=;MultipleActiveResultSets=true;TrustServerCertificate=True",
    "Administrators": [
      "2e0c5e52-31d3-405f-b880-619e92c66047"
    ],
  }
Unauthenticated Requests
Adding the AuthorizationHub UI to a web application includes REST endpoints. If your application is configured to redirect unauthenticated requests to a login page, you’ll need to add some configuration that allows unauthenticated requests sent to AuthorizationHub’s REST endpoints to return an unauthenticated response.
builder.Services.AddDefaultIdentity<IdentityUser>(options => options.SignIn.RequireConfirmedAccount = true)
    .AddEntityFrameworkStores<ApplicationDbContext>();
builder.Services.AddRazorPages();

builder.Services.ConfigureApplicationCookie(_ =>
{
    _.Events.OnRedirectToLogin = context =>
    {
        var options = new AuthorizationHub.UI.Configuration.Options();

        if (context.Request.Path.Value.StartsWith(options.ApiPath))
        {
            context.Response.Headers["Location"] = context.RedirectUri;
            context.Response.StatusCode = 401;
        }

        return Task.CompletedTask;
    };
});

builder.Services.AddAuthorizationHub();
Routing Fallback
At the end of the Program.cs file, you may have a fallback file defined to service requests that don't match a route. A common example would be to default to a root level index.html file.
app.UseRouting();
app.UseAuthorization();
app.MapRazorPages();
app.UseAuthorizationHubUI();

app.MapFallbackToFile(“index.html”)
The requests to the AuthorizationHub UI will not have a route defined, so if you use a fallback, you'll need to make an exception for AuthorizationHub.
app.MapFallbackToFile("{*path:regex(^(?!ui/resources/authorizationhub-bundle.js$|authorizationhub).*$)}", "index.html");
Congratulations! That's it. Really. Now it's time to start it up, and build an organizational tree.